Adding A New Whitelabeled Cloud Domain
- Table of Contents
- Choose your Domain
- Set up the DNS
- Configure Engine
- Configure Studio
- Testing
As a GreenArrow Cloud customer, you can start sending from GreenArrow as soon as you receive the login to the server by using the domain that was used to deploy your license. In most cases, the domain will look similar to this: c123.drhinternet.net.
Because this domain is present in various places in your email, your recipients could see it. Where exactly this domain would appear to your recipients will depend on the email client they use. For example, this is how Gmail’s webmail client shows our domain in your email:
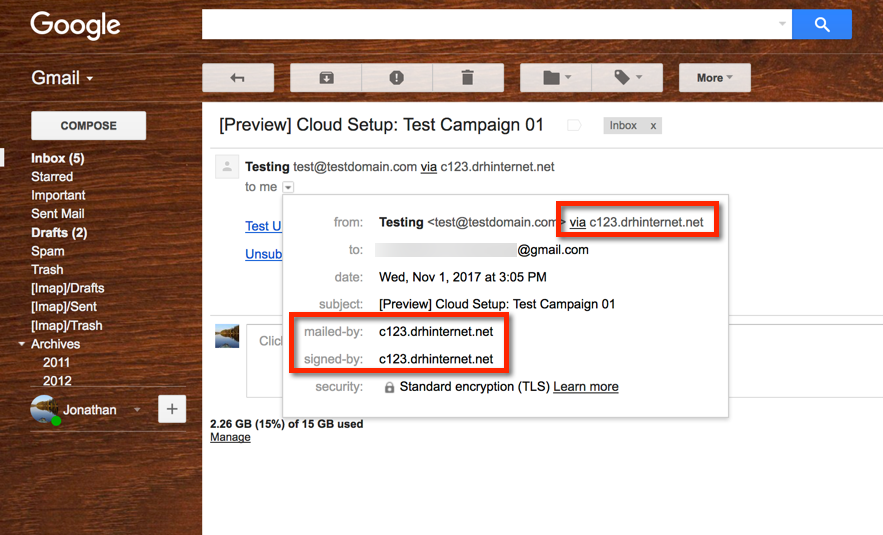
GreenArrow does have the option to Whitelabel your emails with your own domain. This document outlines the steps required to set this up.
While some steps in this document do overlap with on-premise licenses, this is applicable only to GreenArrow Cloud Customers. If you are not a Cloud Customer, please reference our New Domain Setup documentation.
Choose your Domain
First, you must choose which domain you’re going to use with GreenArrow. You will be updating DNS records for this domain, so you will need to choose a domain that is dedicated to GreenArrow (one that is not used for anything else). If you’d like to use a domain that you’re already using for other other applications (like for your corporate website or email), then you should choose a subdomain instead.
For example, our company is DRH Internet with our website at https://drh.net, so using drh.net to whitelabel GreenArrow would take down our existing website. Instead, we will use a subdomain that doesn’t yet exist, like cloudexample.drh.net.
Using that example domain cloudexample.drh.net, here is what your email would look in Gmail like after you finish this setup:
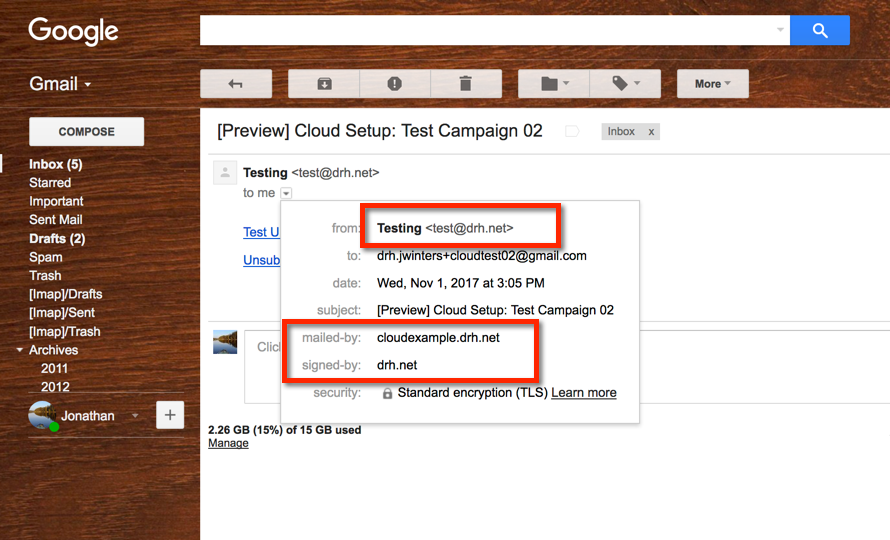
Notice that only the white labeled domain is present; your cloud server domain c123.drhinternet.net is no longer showing.
Set up the DNS
If you host your domain on Cloudflare disable the CDN feature for the CNAME record after adding it. This is done by clicking on the cloud icon to the right of the record. The CDN feature is disabled when the arrow passes over the cloud - it doesn’t go through the cloud.
Next, you’ll need to set up your DNS records.
You will need to post the following DNS changes to the zonefile for the domain or subdomain you chose in the previous section. If you’re unsure of where to make these changes, you will need to check with the person on your team who manages the DNS for your domain.
Complete all of the following:
- Make note of the current domain name of your GreenArrow server. This will look like
c123.drhinternet.net(the number123will be different for your server, so make sure you have your server’s domain). - Create a
CNAMErecord for the subdomain you’ve chosen. If you’re usingcloudexample.drh.netthen here is the record you’d create:cloudexample.drh.net CNAME c123.drhinternet.net - Set up a DKIM Key in GreenArrow Engine’s configuration:
- In Engine, click on
DKIM Keysunder the Configure menu - In the bottom right corner of the DKIM Keys configuration, click
Add DKIM Key. - Enter your details:
-
Domain: This can be
drh.net, orcloudexample.drh.net, whichever you’d like to use in the From Address of your emails. For this example, I’m going to usedrh.net -
Selector: If this is your only DKIM Key on
drh.netthen you can use the selector provided. If you already have a DKIM Key that is usingdefaultas the selector, then you’ll need to choose another. - Default for domain: Yes, if no default key already exists for this domain
- Generate a new private key: leave checked
- Key Bits: 1024 bits (recommended)
-
Domain: This can be
- Click
Saveto generate the key - On the next page after saving, scroll down to
DNS Record for Public Key. Use the data in those fields to create the DNS record by copying the Name and Value from GreenArrow into your domain’s zonefile.
- In Engine, click on
Configure Engine
Add the domain configurations into Engine. Studio will also use these settings:
- Create an Aliased Incoming Email Domain:
- In Engine, click on
Domainsunder the Configure menu - In the bottom right-hand corner of the Domains configuration, click
Add Aliased Domain. - Enter your details:
-
Domain Name: Enter your domain that you used to create the CNAME record above. Using the example above it would be:
cloudexample.drh.net -
Alias This Domain To: If there is more than one option, choose the one that matches GreenArrow’s domain used in the CNAME. Using the example above it would be:
c123.drhinternet.net
-
Domain Name: Enter your domain that you used to create the CNAME record above. Using the example above it would be:
- Click
Save
- In Engine, click on
- Create the URL Domain:
- In Engine, click on
URL Domainsunder the Configure menu - In the bottom right-hand corner of the Domains configuration, click
Add URL Domain. - Enter your details:
-
Domain: Enter your domain that you used to create the CNAME record above. Using the example above it would be:
cloudexample.drh.net - SSL: Leave unchecked
-
Domain: Enter your domain that you used to create the CNAME record above. Using the example above it would be:
- Click
Save
- In Engine, click on
Configure Studio
Configure Studio to use the new domain:
- In GreenArrow Studio, click on
ADMIN | My Organization - Click the
Edit this Organizationbutton - Scroll down to
PERMISSIONS - Select the bounce email from the domain that you just added on
BOUNCE EMAIL MODE: ALWAYS USE THE FOLLOWING BOUNCE EMAIL- For our example it is[email protected] - Select the domain that you just added on
URL DOMAIN MODE: ALWAYS USE THE FOLLOWING URL DOMAIN- For our example it iscloudexample.drh.net - Scroll to the bottom of the page and click on
Update this Organization
Testing
We recommend testing the above configuration by sending an email to yourself. Gmail accounts are free and Google does a good job of exposing potential issues in the above configurations, so I’ll use Gmail in my testing examples. But any email service that checks for DKIM and SPF, and which allows you view the full headers of the email will work for the testing steps I have outlined below.
- Create a test campaign in GreenArrow Studio (you can use an existing Mailing List or create a new one):
- Content: Create any simple content you would like. Make sure to include at least one URL.
-
Segment: We aren’t going to send this campaign (we’re just going to use the
Previewfeature), so you can leave this unconfigured. -
Delivery Settings: Fill in at least the following:
- FROM NAME: Any name is fine.
-
FROM EMAIL: Use an email address at the domain used in the
Set up a DKIM Keystep above. From our example, it is:[email protected] - VIRTUAL MTA: System Default Route
-
URL DOMAIN: Use the URL Domain you created in the
Create the URL Domainstep above. From our example, it is:cloudexample.drh.net - TRACK LINKS: Yes
-
BOUNCE EMAIL: Use the Domain you created in the
Create an Aliased Incoming Email Domainstep above. From our example, it is:[email protected]
- On the Campaign Summary Page, click the
Previewbutton - Enter your testing Gmail address and click
Send this preview - Check your Gmail webmail for the preview email
- Click on a link to make sure the redirect works as expected
- Verify the domains listed in the banner:
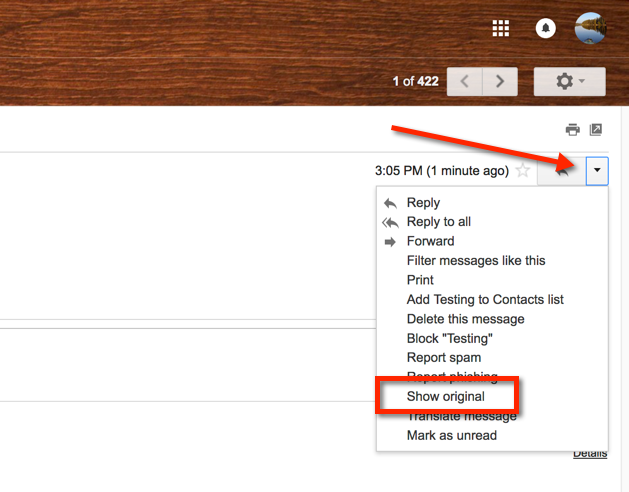
- View Original Message for more details:
- Make sure SPF and DKIM are passing:
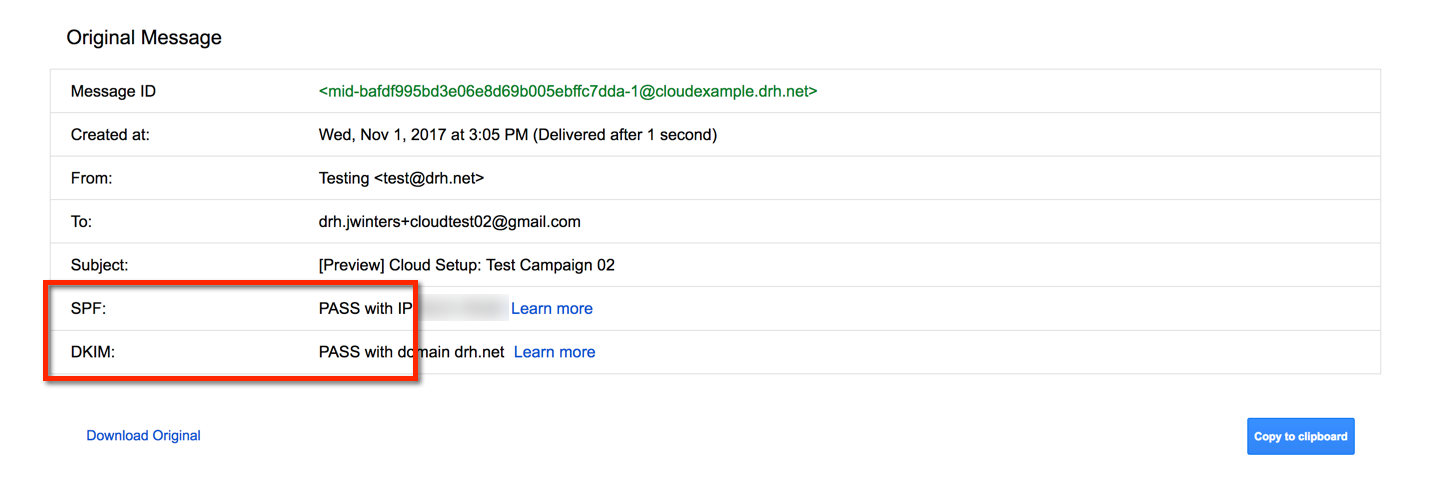
If any of the above testing does not work or if you see a failure in any of the headers, then you’ll need to review all of the DNS changes that were made. Sometimes it is just a matter of DNS propagation (the time it takes for your DNS changes to show up out on the Internet), so you may just need to wait a few hours and test again.