Creating a New DKIM Key
- Table of Contents
- Introduction
- Web Browser DKIM Configuration
- Command Line DKIM Configuration
- Using a Custom Selector
- DNS and Yahoo’s Feedback Loop
Introduction
DKIM is normally configured via GreenArrow Engine’s web interface. However, command line configuration is also possible. This page documents both options.
Web Browser DKIM Configuration
The first step in configuring DKIM is to create the private key that’s used to digitally sign messages.
Complete the following steps to create a new private key:
- Login to GreenArrow Engine’s web interface.
- Navigate to
Configure=>DKIM Keys:
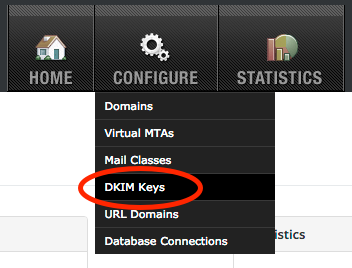
- Click the
Add DKIM Keybutton:

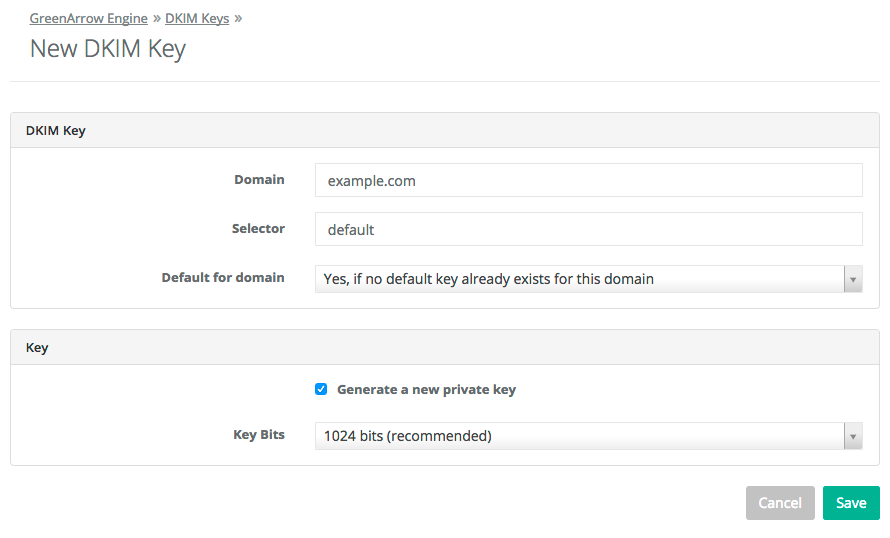
- Enter the domain that you wish to generate the new DKIM key for in the
Domainfield, then clickSave. In most situations, we recommend leaving the remaining fields at their default values:
- If you wish to import an existing DKIM Private key, uncheck the box next to
Generate a new private keyand paste your private key into the text entry block that opened: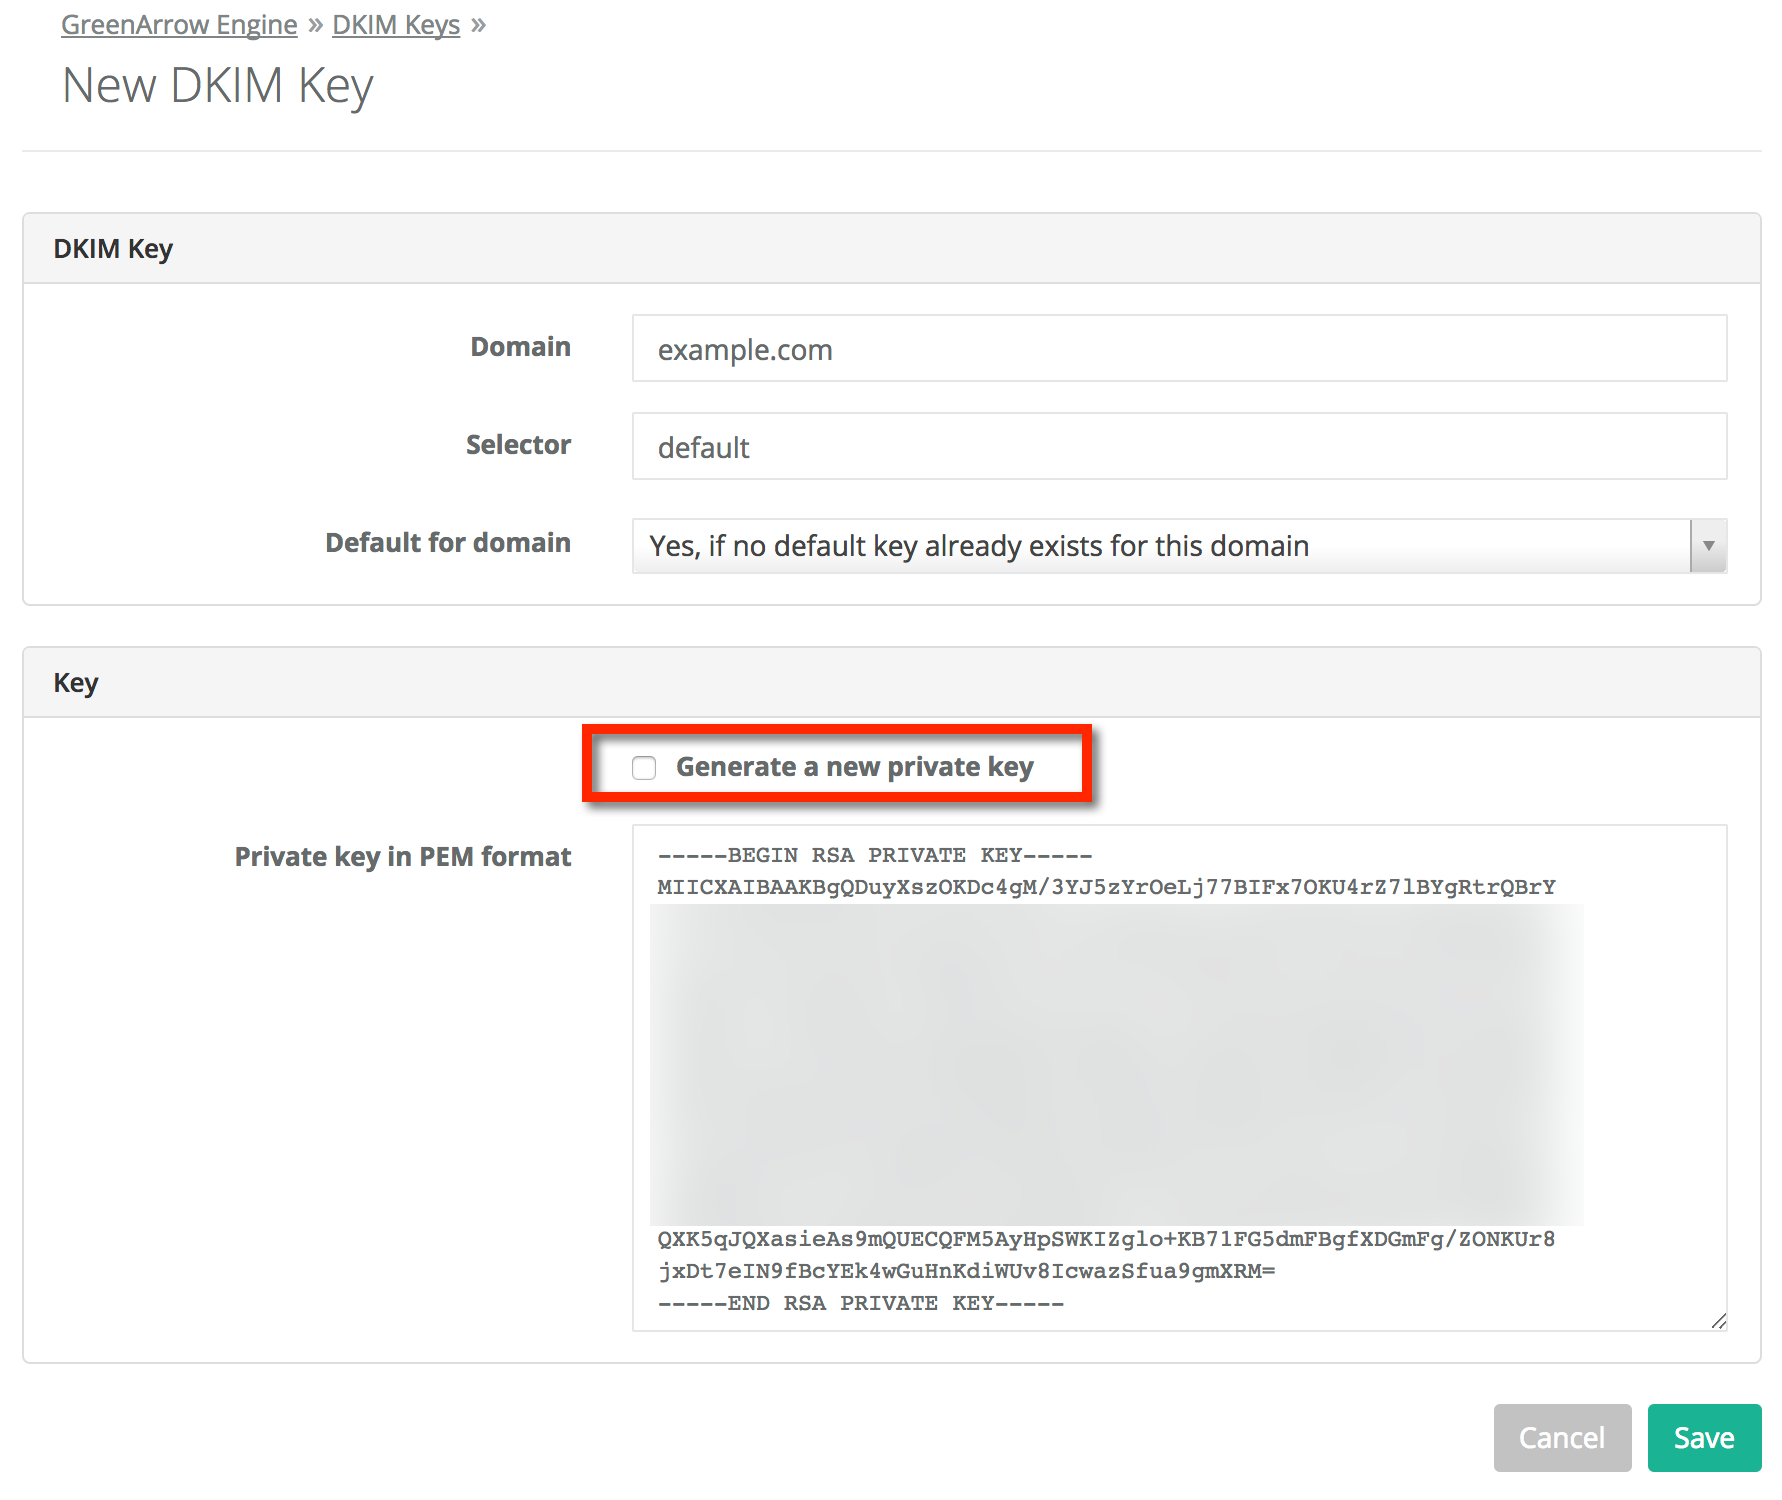
- Be sure to complete the final setup steps.
Command Line DKIM Configuration
The first step in configuring DKIM is to create the private key that’s used to digitally sign messages. To create a private key for example.com, using the default selector, run the command below:
/var/hvmail/bin/dkeasy_new_key.legacy example.com
To create a DKIM key for example.com, using the greenarrow selector, run the command below:
/var/hvmail/bin/dkeasy_new_key.legacy example.com greenarrow
Using a Custom Selector
GreenArrow’s default selector is literally named default. You may overwrite this with another selector if you wish.
DNS and Yahoo’s Feedback Loop
After a new DKIM key is created, the next step is to create the DNS records for it and testing to make sure it passes.
Yahoo’s Feedback Loop is DKIM based, so you’ll probably want to register any newly created DKIM keys with Yahoo. The full details of this are outside the scope of this document, but feel free to contact GreenArrow technical support for details.