Creating DNS Records for DKIM
Introduction
After a new DKIM key is created, the next step is to create the DNS records for it. The DNS records that are created in this step act as the public key and policy records, which are used by recipients to verify DKIM signatures.
DKIM is normally configured via GreenArrow Engine’s web interface. However, command line configuration is also possible. This page documents both options.
Web Browser DKIM Configuration
If you just created a new DKIM key, you can skip ahead to the last step in this section since you’re already at the screen that the previous steps instruct you to navigate to.
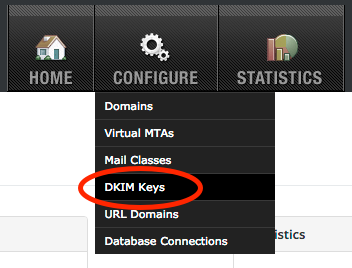
Complete the following steps to configure DNS:
- Login to GreenArrow Engine’s web interface.
- Navigate to
Configure=>DKIM Keys:
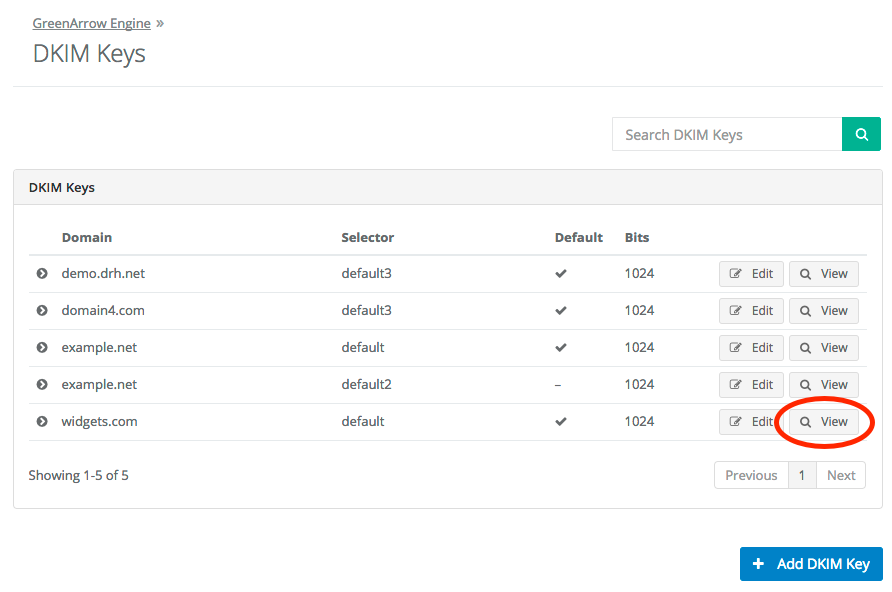
- Locate the DKIM key that you wish to configure DNS records for, and click the
Viewlink:
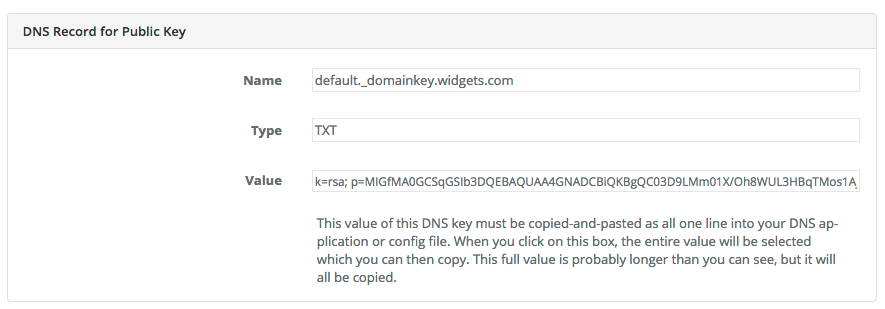
- Create the
TXTDNS record that is listed on the page. It will differ from what is shown in the screenshot below:
Command Line DKIM Configuration
To display the DNS record that’s needed for example.com’s default selector, run the command below:
/var/hvmail/bin/dkeasy_show_dns_record.legacy example.com
To display the DNS record that’s needed for example.com’s greenarrow selector, run the command below:
/var/hvmail/bin/dkeasy_show_dns_record.legacy example.com greenarrow
Yahoo’s Feedback Loop
Yahoo’s Feedback Loop is DKIM based, so you’ll probably want to register any newly created DKIM keys with Yahoo. The full details of this are outside the scope of this document, but feel free to contact GreenArrow technical support for details.